Transitioning from Heroku Free Tier to GCP + YugabyteDB
This post captures the list of steps I followed to migrate a HTTP service from a Heroku dyno to a Google Cloud Platform instance powered by YugabyteDB cluster as the database.
- Introduction
- Current Architecture
- New Architecture
- Phase 1: Setting up a parallel service on GCP
- Phase 2: Bring the GCP service upto speed
- Phase 3: Shut down Heroku server
- Future Improvements
Introduction
To deploy Twirl, my URL shortening service, I was using Heroku’s free tier plans (more on how I built this app here, here, and here). But now that it is no longer free and (more importantly) there is no plausible way to pay for their premium plans from India (whether via Indian cards or any other payment methods), I was forced to shift my app to a more traditional cloud provider.
Since I have an existing setup on Google Cloud Platform (GCP), I decided to migrate my setup to my GCP instance. Additionally, I chose to use YugabyteDB instead of PostgreSQL as my database.

Here are the steps I followed to migrate out of Heroku, for my URL shortening service: twirl.otee.dev
Current Architecture
The following diagram largely displays the current architecture. For more details, read: https://otee.dev/2022/01/13/making-short-links-shorter.html
Major components:
- nginx: this is running on GCP and is used for custom domain mapping to a free Heroku tier dyno, without having the default
herokuappdomain in the URL. - HTTP server: this is NodeJs app that uses PostgreSQL for storing state. Here’s the repo: https://github.com/oitee/twirl
- PostgreSQL: the database that stores the users, short links and other associated data.

New Architecture
In the first phase, we want to independently run the system on GCP. In this lift-and-shift phase, each of the components of the system will be running outside of Heroku:
| Existing component | Change |
|---|---|
| nginx | Redirect to local port instead of Heroku dyno |
| Heroku HTTP server | GCP Compute Instance |
| PostgreSQL | Managed YugabyteDB |
In the second phase, we want to move the data that is already present in the PostgreSQL database on Heroku, to the new YugabyteDB Managed instance. The reason for choosing YugabyteDB was not lightly made. Most importantly, it supports PostgreSQL operations so it fits our use-case. There are many other advantages as well which I will illustrate in another post.
In the last phase, we will decommission Heroku dyno.
Phase 1: Setting up a parallel service on GCP
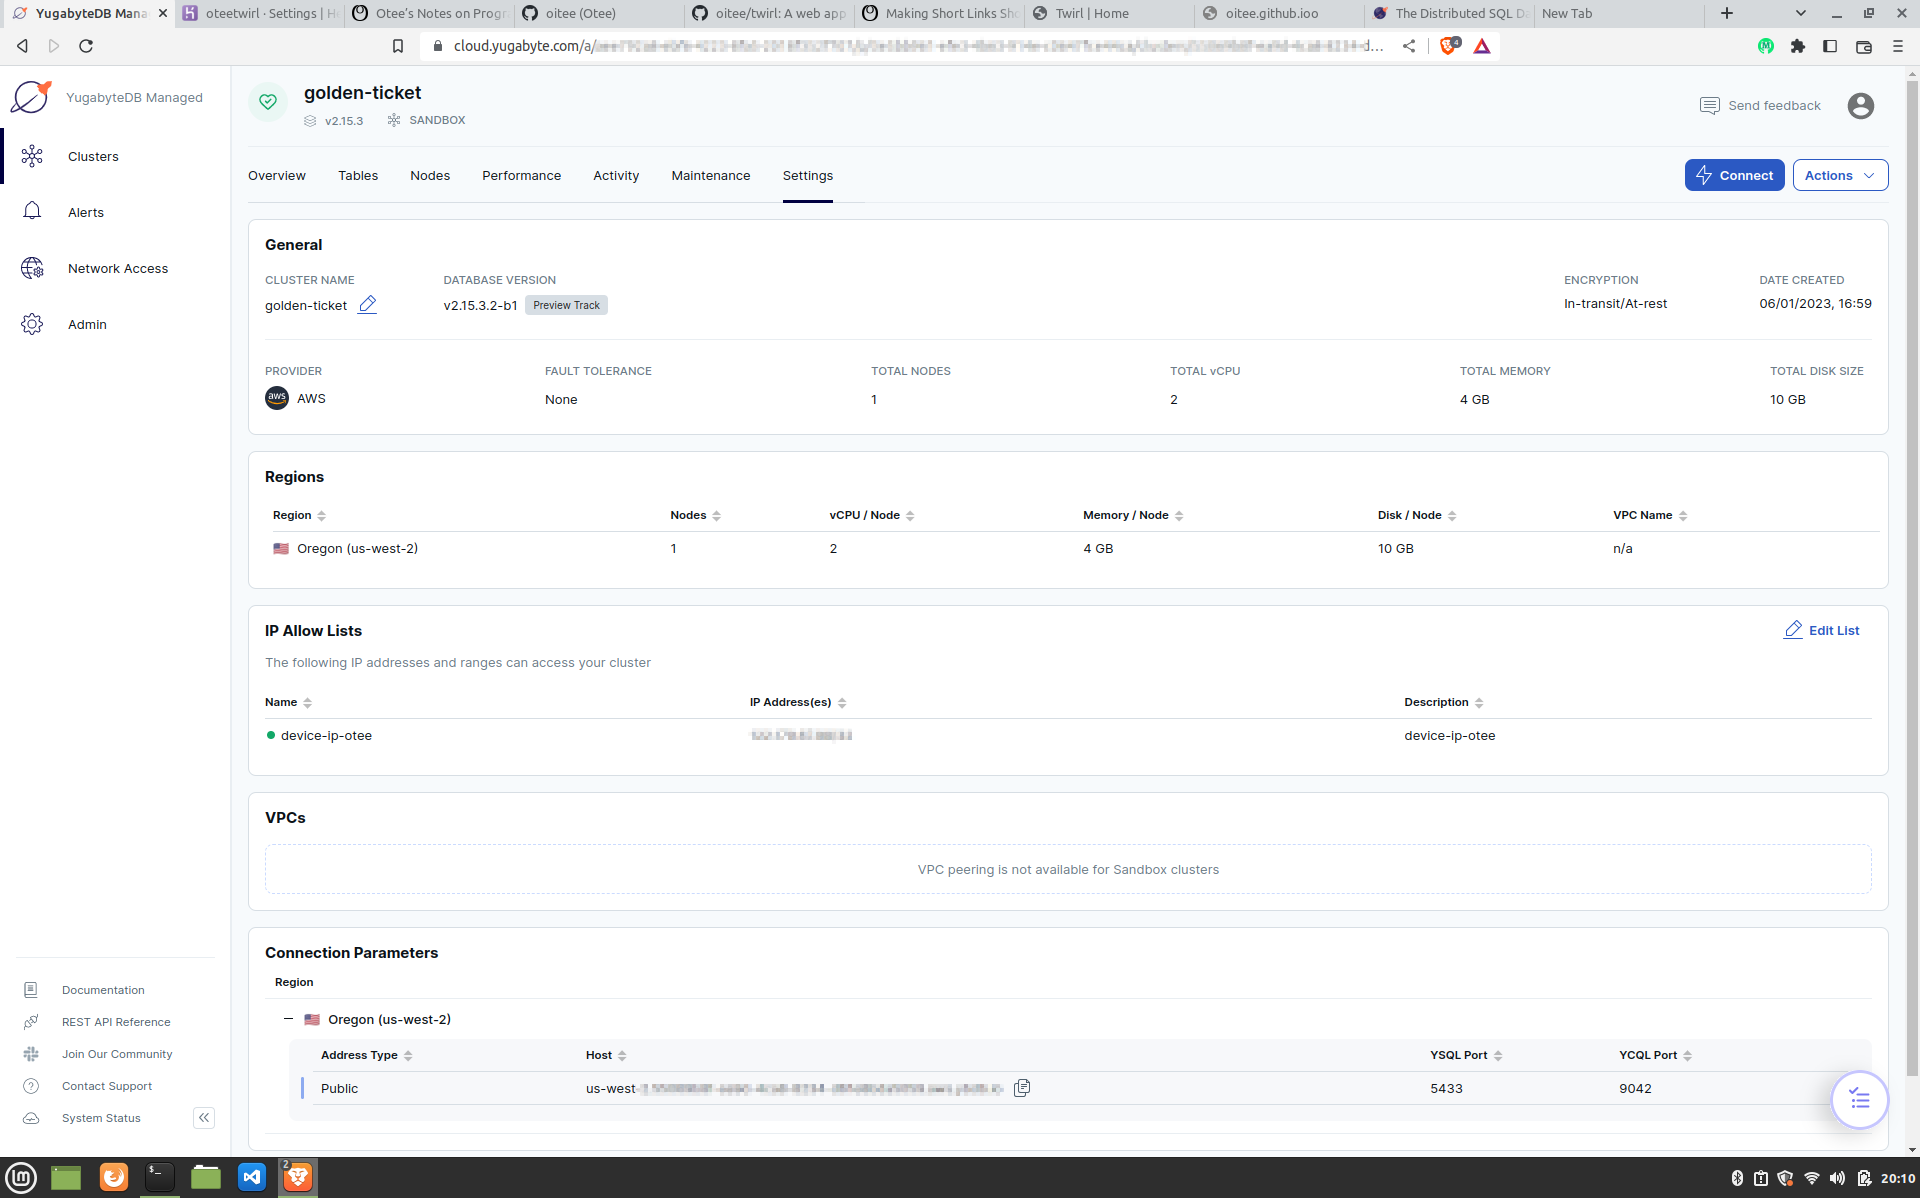
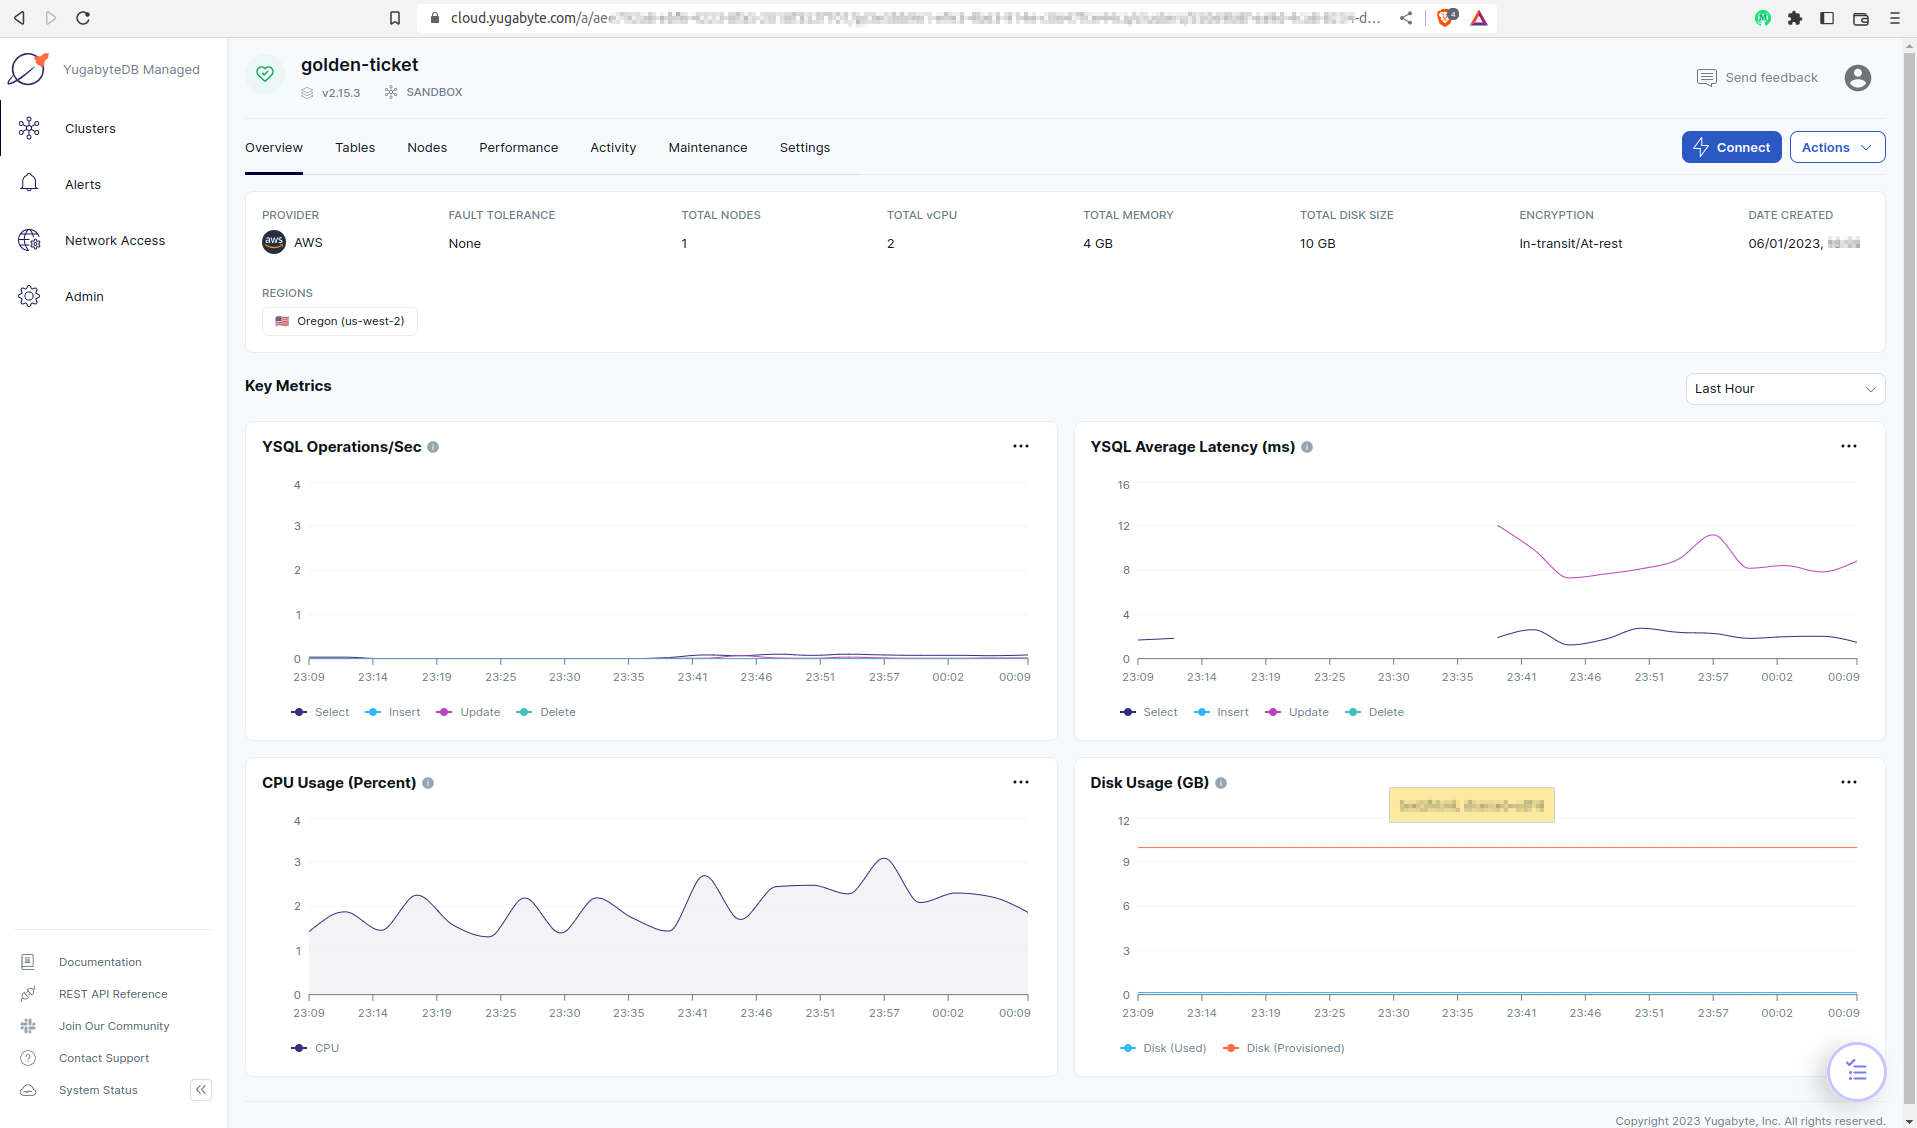
Step 1.1: Create YugabyteDB cluster
Setting up a YugabyteDB Managed instance is quite straight-forward. After completing the sign-up process on https://cloud.yugabyte.com/signup, the cluster looks like this:
Once set up, we need to connect to this database to set up our schema for the URL shortening app, as per the ReadMe of the project. To do this, we have to use the connection string as per the documentation on YugabyteDB:
postgresql://<DB USER>:<DB PASSWORD>@us-west-2.....aws.ybdb.io:5433/yugabyte?ssl=true&sslmode=verify-full&sslrootcert=<ROOT_CERT_PATH>
Note that to connect to the YugabyteDB cluster, we need to download a digital certificate - this can be done from the dashboard itself, by clicking on the connect button on the top left corner, and choosing the Connect to your Application option. We need to add the path to this certificate to the connection string. This certificate is used for verify the identity of clusters, as YugabyteDB uses TLS protocol for communicating with its clusters.

Also, to connect to the YugabyteDB cluster, we need to white-list the client IP address. This also can be done from the dashboard itself (which provides a convenient option to add your current IP address to the IP Allow list). At this point, we must add the IP address of our local machine. Ultimately, the IP Allow list should contain the public IP address of our GCP instance only.
Step 1.2: Set up the Database
To connect to the YugabyteDB, we can use the command line utility psql which is compatible with PostgreSQL and like databases.
We will use the connection string mentioned above to connect:
psql "postgresql://<DB USER>:<DB PWD>@us-west-2....aws.ybdb.io:5433/yugabyte?ssl=true&sslmode=verify-full&sslrootcert=/home/otee/Downloads/root.crt"
At this point, psql should connect to the default yugabyte database. We can now create a new database for our app, twirl
yugabyte=> DROP DATABASE IF EXISTS twirl;
NOTICE: database "twirl" does not exist, skipping
DROP DATABASE
yugabyte=> CREATE DATABASE twirl;

CREATE DATABASE
yugabyte=>
yugabyte=> \connect twirl;

psql (12.12 (Ubuntu 12.12-0ubuntu0.20.04.1), server 11.2-YB-2.15.3.2-b0)
SSL connection (protocol: TLSv1.3, cipher: TLS_AES_256_GCM_SHA384, bits: 256, compression: off)
You are now connected to database "twirl" as user "admin".
twirl=>
After this, the requisite schema for this app can be set up, following the queries mentioned ont the ReadMe.
Step 1.3: Local sanity testing
Now that the schema has been set up correctly, we need to make sure our app can use this. For this, we can run our app locally and use this connection string as the db endpoint. This is for local sanity testing that the app functions normally before we try anything infrastructure specific.
To run the app locally, the following command needs to be run. This command is specific to the app at hand, which expects a few environment variables, like the db connection string:
# Note that we need to use the new database `twirl`
# and not the default `yugabyte` in the connection string
PG_SSL_CONNECTION=true CUSTOM_DOMAIN_NAME=localhost:4001 RECAPTCHA_SECRET=EXEMPTED PORT=4001 COOKIE_SECRET=<eiffeltower...> PG_CONNECTION_STRING="postgresql://<DB USER>:<DB PWD>@us-west-2....aws.ybdb.io:5433/twirl?ssl=true&sslmode=verify-full&sslrootcert=/home/otee/Downloads/root.crt" node app.js
Twirl listenning on 4001...
At this point, the app works locally! 🎇
Step 1.4: Deploy HTTP server on GCP
Now, we need to setup the app on our GCP instance. For this, the following steps need to be followed:
-
After ssh-ing to GCP instance, clone the repo:
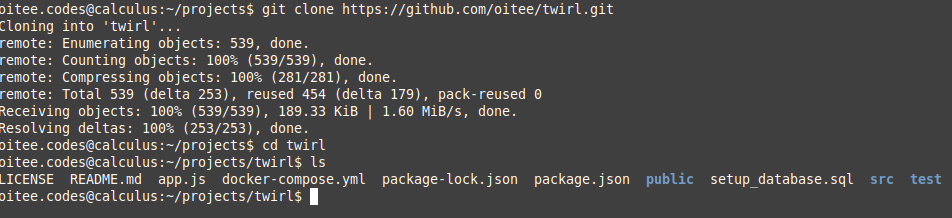
-
Copy the root certificate file (downloaded from YugabyteDB dashboard) to the GCP instance (ssh alias already set up as
calculuslocally).scp /home/otee/Downloads/root.crt calculus:/home/oitee.codes -
Run the command we ran locally earlier:
 PG_SSL_CONNECTION=true CUSTOM_DOMAIN_NAME=localhost:4001 RECAPTCHA_SECRET=EXEMPTED PORT=4001 COOKIE_SECRET=<eiffeltower...> PG_CONNECTION_STRING="postgresql://<DB USER>:<DB PWD>@us-west-2....aws.ybdb.io:5433/twirl?ssl=true&sslmode=verify-full&sslrootcert=/home/oitee.codes/root.crt" node app.js
 Twirl listenning on 4122...
Once we see the system startup, we have no way of connecting to this port from the browser because this port is not exposed. We will do this in the next step.
Note: When we run a service on an instance like this, one of the housekeeping items to ensure is that if the instance reboots (which it will eventually), we have to make sure that our HTTP server is automatically started. This was already being taken care of by Heroku, but here we need to do this ourselves (this will be done later). But even when we do this, it is not guaranteed that the instance would not be irrevocably lost; in which case we will need to set it up manually again.
Step 1.5: Setting up nginx config
For our parallel (trial) service, we need to create a simple nginx config that maps requests to a test sub-domain twirl-test.otee.dev to this new HTTP service.
server {
        listen 80;
        listen [::]:80;
        server_name twirl-test.otee.dev;
        location / {
         proxy_pass http://127.0.0.1:4122;
        }
}
Next, we need to add a new DNS entry pointing the trial sub-domain twirl-test.otee.dev to the GCP instance.
Unfortunately, .dev domains only support https connections. So, we have to install a certificate for this sub-domain. We can do this with certbot, (following the official documentation)
sudo certbot --nginx
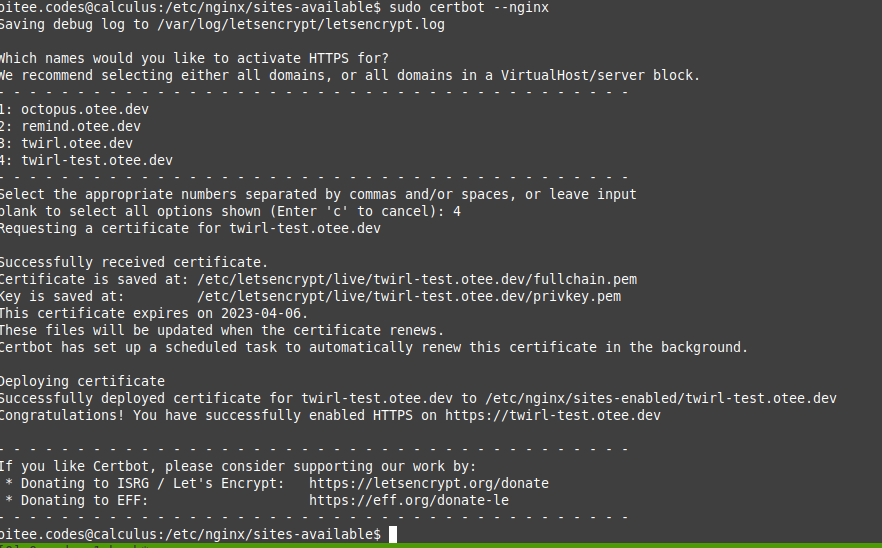
After cerbot finishes adding the certificate, the earlier nginx configuration will be updated with the new certificate enforcing HTTPS:
server {
        server_name twirl-test.otee.dev;
        location / {
         proxy_pass http://127.0.0.1:4122;
        }

    listen [::]:443 ssl; # managed by Certbot
    listen 443 ssl; # managed by Certbot
    ssl_certificate /etc/letsencrypt/live/twirl-test.otee.dev/fullchain.pem; # managed by Certbot
    ssl_certificate_key /etc/letsencrypt/live/twirl-test.otee.dev/privkey.pem; # managed by Certbot
    include /etc/letsencrypt/options-ssl-nginx.conf; # managed by Certbot
    ssl_dhparam /etc/letsencrypt/ssl-dhparams.pem; # managed by Certbot

}
server {
    if ($host = twirl-test.otee.dev) {
        return 301 https://$host$request_uri;
    } # managed by Certbot

        listen 80;
        listen [::]:80;
        server_name twirl-test.otee.dev;
    return 404; # managed by Certbot

}
Step 1.6: Add GCP instance IP address to Yugabyte allow-list
The GCP IP address needs to be white-listed on the YugabyteDB dashboard, because random connections to the database are not allowed. Note that we need to add the permanent public IP address (and not the internal ephemeral IP address) of the GCP instance.
Now, the system should work with the YugabyteDB as the database!
Note: we have thus far set-up a parallel service using a temporary sub-domain; we will still need to point twirl.otee.dev (the original sub-domain) to this GCP instance. This will be done at a later step.
Phase 2: Bring the GCP service upto speed
Step 2.1: Migrate existing data from Heroku PosgreSQL to YugabyteDB Managed
Now that the HTTP server is working, we need to migrate the existing data from the postgreSQL database on Heroku to the newly set-up YugabyteDB database.
For this, we can use pg_dump which comes installed with psql. pg_dump is a back-up utility for a PostgreSQL database. It spits out SQL commands which can be used to reconstruct the database with all its the data present at the time of the backup.
For this, we need to use the same PostgreSQL connection string that the Heroku app uses.
Note: We could not use pg_dump from the terminal of our local machine directly, because the Heroku instance was using postgres version 13 and the corresponding postgres-client version was not readily available. So, we used this docker file and used pg_dump inside that docker container:
# Going into the container
sudo docker exec -it twirl_postgres_1 bash

root@3012d2b15617:/# pg_dump -d "<psql connection string>" -f sql_queries.txt

##Leave the Docker container and copy the file
sudo docker cp twirl_postgres_1:/sql_queries.txt /tmp/sql_queries.txt
Now that the backup is ready, we need to recreate the twirl database on YugabyteDB. For this, we need to connect to the default database on YugabyteDB called yugabyte and create the twirl database afresh.
yugabyte=> DROP DATABASE IF EXISTS twirl;
DROP DATABASE
yugabyte=> CREATE DATABASE twirl;

CREATE DATABASE
yugabyte=>
Next, we need to restore the data from the file created by pg_dump. Since this file contains just SQL commands, we can just run psql on the new database taking the SQL commands from the file instead of the prompt:
# Connection string to yugabyte
psql "postgresql://....ybdb.io:5433/twirl?ssl=true&sslmode=verify-full&sslrootcert=/home/otee/Downloads/root.crt" -f /tmp/sql_queries.txt
Note that some of the statements may fail - this can be due to commands related to ownership access and other settings but the data should not be missing. Once the back-up is complete, we can do a simple sanity test by checking the number of rows in each table in both the databases.
At this point, our parallel service is upto speed with the existing service. In other words, twirl-test.otee.dev and twirl.otee.dev should have the same data, i.e., user credentials, short-links, access counts etc. So, we have successfully migrated the data from Heroku to YugabyteDB and therefore most of the work is now done. 🥂
Step 2.2: Install Twirl as a service on GCP
The node process running in the background can crash due to unforeseen exceptions, out-of-memory errors or some other reason like restarting of the VM itself. When this happens (as it inevitably will), our node process will terminate and our app will be unavailable. To solve this, we can use systemd. It is a “system and service manager” for Linux Operating Systems.
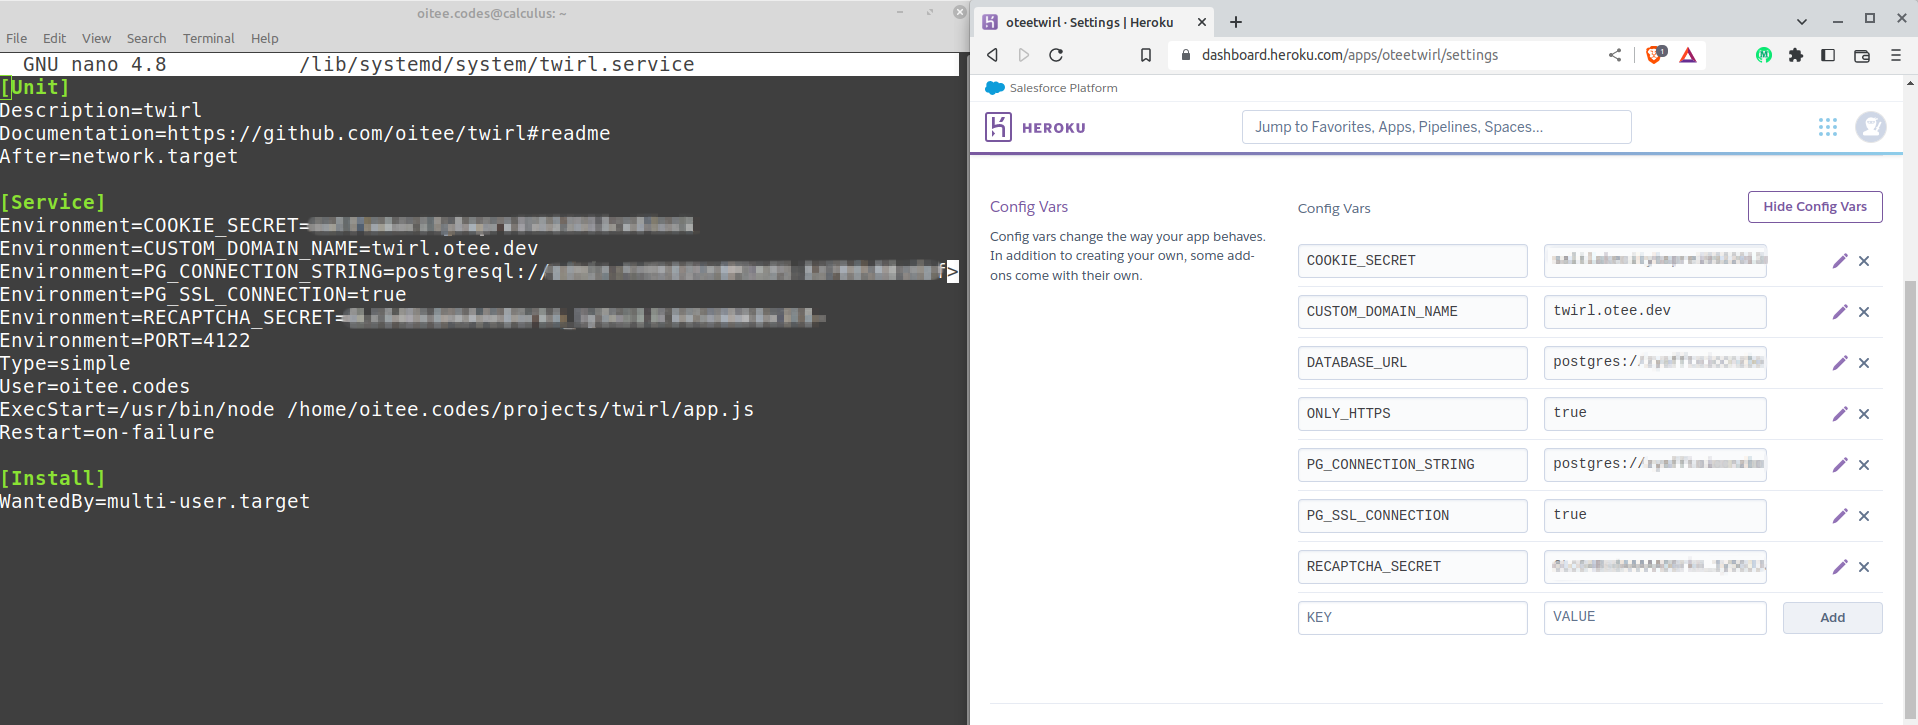
On the GCP instance, we need to create a new systemd service:
sudo nano /lib/systemd/system/twirl.service
This file should contain the following:
[Unit]
Description=twirl
Documentation=https://github.com/oitee/twirl#readme
After=network.target

[Service]
Environment=COOKIE_SECRET=XXX
Environment=CUSTOM_DOMAIN_NAME=twirl.otee.dev
Environment=PG_CONNECTION_STRING=postgresql://XXX.aws.ybdb.io:5433/twirl?ssl=true&sslmode=verify-full&sslrootcert=/home/oitee.codes/root.crt
Environment=PG_SSL_CONNECTION=true
Environment=RECAPTCHA_SECRET=XXX
Environment=PORT=4122
Type=simple
User=oitee.codes
ExecStart=/usr/bin/node /home/oitee.codes/projects/twirl/app.js
Restart=on-failure

[Install]
WantedBy=multi-user.target
Note that we added the PORT environment variable which was not required on Heroku because it was setup by the setup of Heroku.
Step 2.3: Divert traffic from Heroku service to the GCP service
So far we have been making changes on a new sub-domain twirl-test.otee.dev. Now that we are confident that the GCP service is working as expected, we can stop the traffic to the Heroku server via twirl.otee.dev and instead serve it from the GCP instance through twirl.otee.dev. Once we achieve this, twirl-test.otee.dev will no longer be required.
We have to change the nginx configuration for twirl.otee.dev to point to the local port instead of Heroku. Current configuration looks like:
server {
    listen 443 ssl;
    server_name twirl.otee.dev;
    return 301 $scheme://oteetwirl.herokuapp.com$request_uri;

    ssl_certificate /etc/letsencrypt/live/twirl.otee.dev/fullchain.pem; # managed by Certbot
    ssl_certificate_key /etc/letsencrypt/live/twirl.otee.dev/privkey.pem; # managed by Certbot
}
server {
    if ($host = twirl.otee.dev) {
        return 301 https://$host$request_uri;
    } # managed by Certbot

    listen 80;
    server_name twirl.otee.dev;
    return 404; # managed by Certbot

}
Note the 301 redirect to oteetwirl.herokuapp.com. We need to replace this line mainly, by moving away from the return directive to the location directive using a proxy_pass:
server {
    listen 443 ssl;
    server_name twirl.otee.dev;
		location / {
         proxy_pass http://127.0.0.1:4122;
    }

    ssl_certificate /etc/letsencrypt/live/twirl.otee.dev/fullchain.pem; # managed by Certbot
    ssl_certificate_key /etc/letsencrypt/live/twirl.otee.dev/privkey.pem; # managed by Certbot
}
server {
    if ($host = twirl.otee.dev) {
        return 301 https://$host$request_uri;
    } # managed by Certbot

    listen 80;
    server_name twirl.otee.dev;
    return 404; # managed by Certbot

}
Phase 3: Shut down Heroku server
We can now stop the Heroku dyno.

Now twirl.otee.dev should still work and be served from GCP instance powered by the YugabyteDB Managed cluster.
Future Improvements
Permanent Redirections
Note that because we used permanent redirection via HTTP status 301 browsers which previously got redirected to Heroku domain might see the following error:
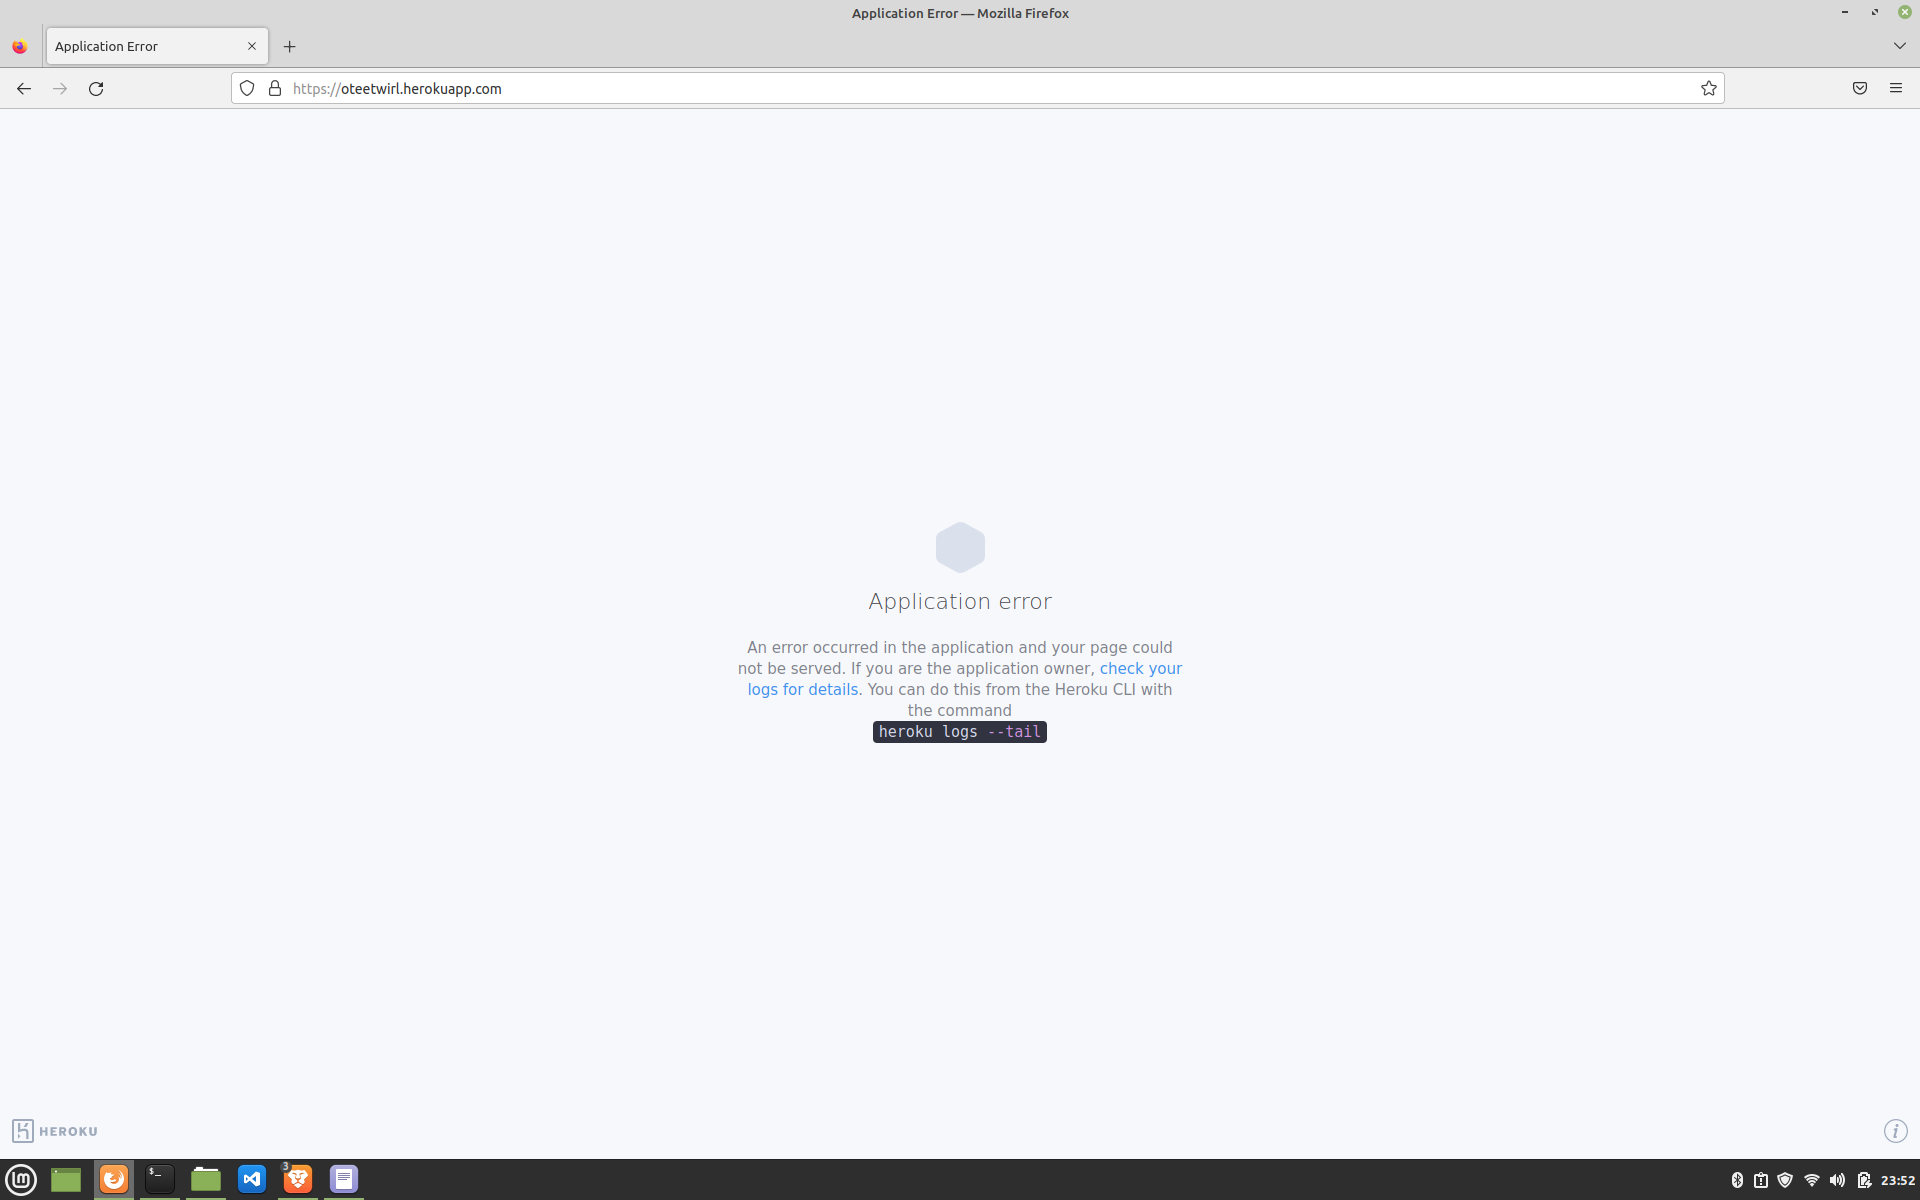
A simple solution to this is to disable cache on the browser and reload:
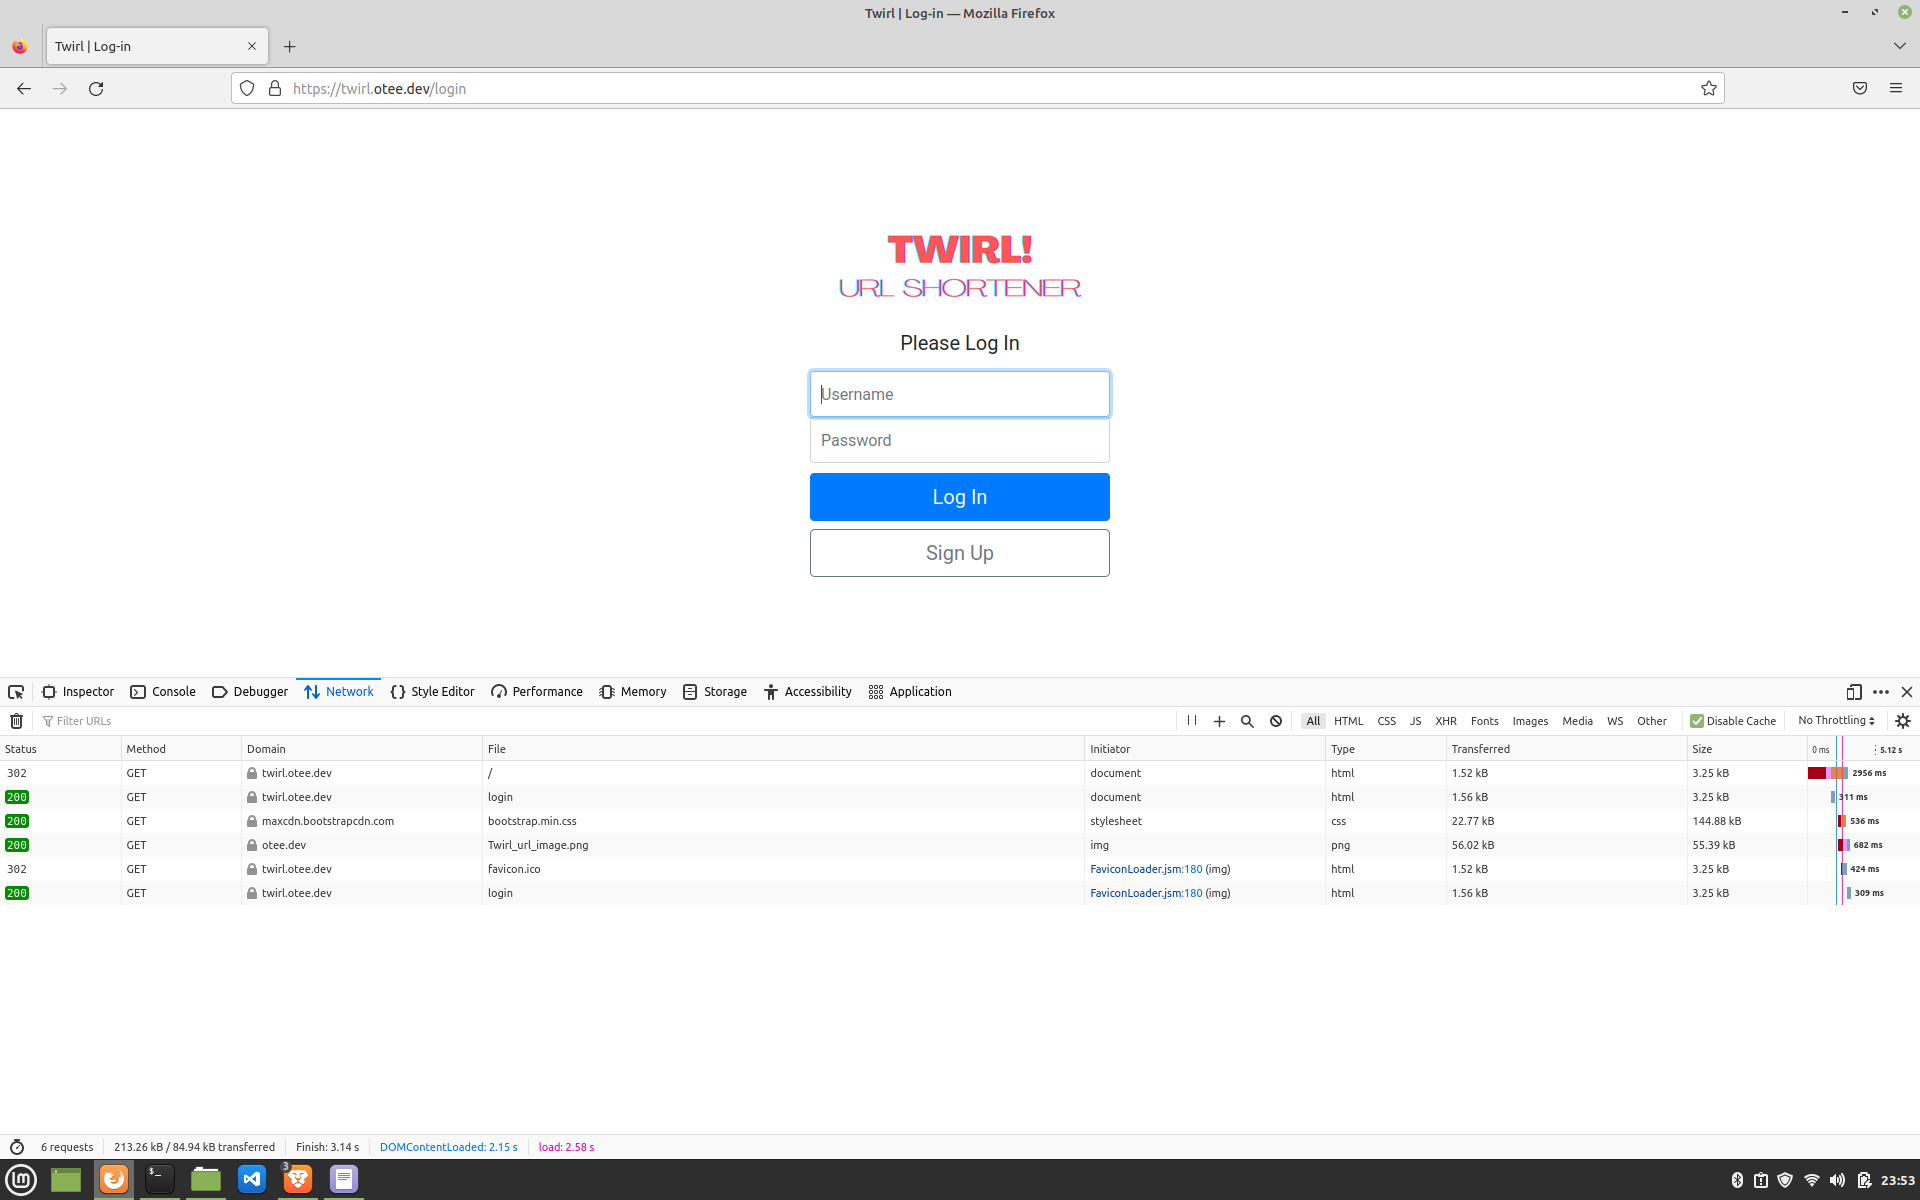
Alternatively, we can write a simple Heroku app that just redirects back to GCP in order to undo the permanent caching without having our users’ browsers. We are going to leave this aside for now.
Backups
Our free Yugabyte instance does not have data-backups. This means that we are at a risk of losing all our data if the Yugabyte cluster goes down. A simple solution to this would be to run the pg_dump command above periodically (crontab) and uploading it to a cloud storage (like s3).
For now, we will run this command manually and store it.