How to Deploy an App Using Google Compute Engine
In this post, we explore how to deploy code to Google Compute Engine (GCE). We will deploy a toy project, which implements Google’s OAuth 2.0 framework.
To read more on OAuth, read this earlier post.
Cloud Services
So far, I have deployed my projects to Heroku. Heroku is an example of Platoform-as-a-Service (PaaS). When we say “as-a-service”, we refer to some form of cloud computing service. A cloud computing service allows us to rely less and less on our ‘on-premise’ infrastructure, by delegating some of our responsibilities/needs to a cloud service provider.
There are three kinds of cloud “as-a-service” options:
- Infrastructure-as-a-Service (IaaS)
- Platform-as-a-service (PaaS)
- Software-as-a-Service (SaaS)
In a PaaS, the platform (Heroku) handles most of the aspects of deploying an application, other than writing the code itself. It takes care of the environment to build and deploy applications (such as installing and updating the operating system and managing the physical machines hosting the application, providing publicly available URLs, logging, memory-management, scaling etc). We are only concerned with writing the code and running and managing our applications. Essentially, a PaaS abstracts out the infrastructure on which the code runs. Apart from Heroku, Google App Engine and AWS Beanstalk are some other examples of PaaS.
GCE is an example of IaaS. Some other examples of IaaS are AWS EC2, and Microsoft Azure. Unlike PaaS, IaaS provides access to only the bare infrastructure for deploying our application like the virtual machine, network access, storage, and shell access. This is very similar to a Linux terminal. We are responsible for everything else: deployment, managing necessary applications, public access, routing, logging, scaling, etc.
In a SaaS, the service provider delivers the entire software, which is managed entirely by the service provider. Examples of SaaS include: web-based services like Gmail and Outlook.
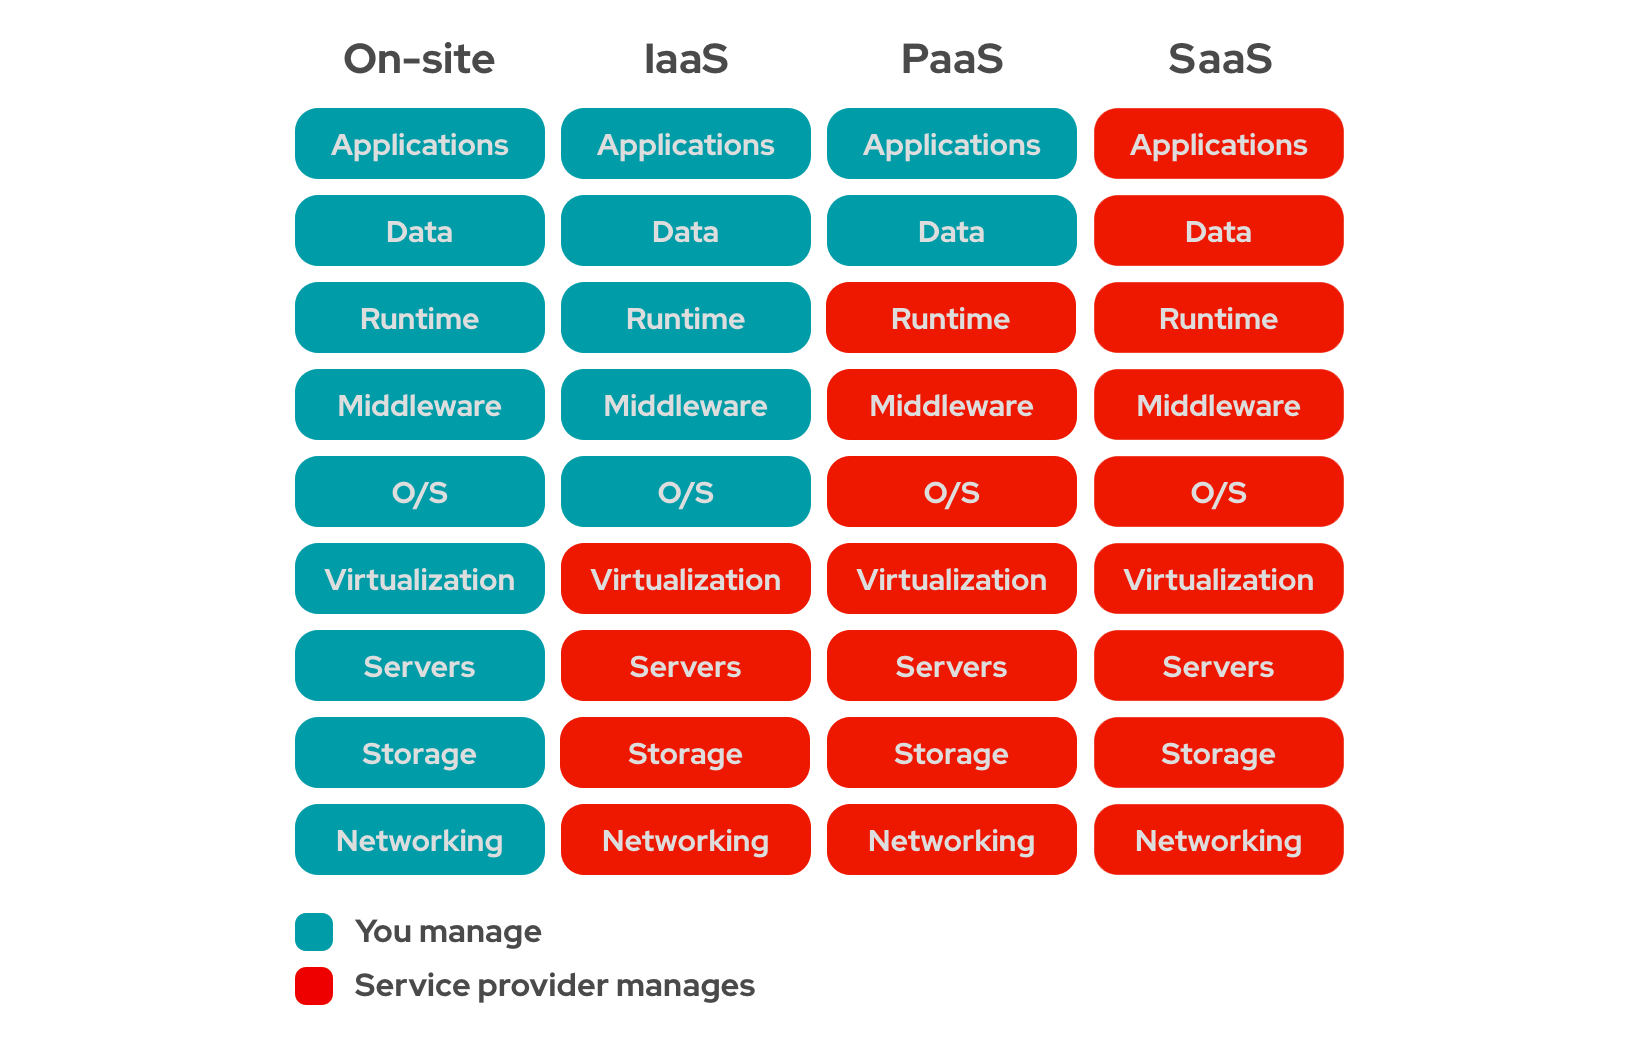
Difference between Deploying to different kinds of systems (Source)
In the following part of this post, I list down the steps I followed to deploy my toy project on GCE.
Getting Started with GCE
- First, we must create an account starting with a free trial, by visiting this link: https://console.cloud.google.com/
- You may have to create a project before proceeding further. (I had one created already, while implementing OAuth)
- After signing in, we must enable the Compute Engine API
- We should also add a billing alert to ensure that we are not silently charged unexpectedly
Setting Up a Virtual Machine
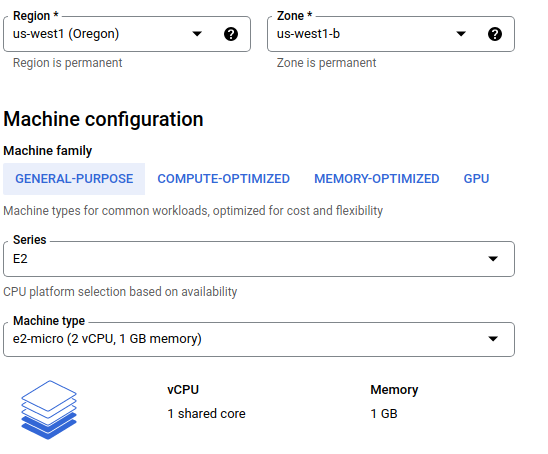
- As per the free tier (which is different from ‘free trial’), GCP provides one
e2-microvirtual machine (VM) every month. So, we should spawn one such VM in the Compute Engine tab. To do this, we should follow the following steps:- Copy the public SSH key(s) of our local machine (example:
~/.ssh/id_ed25519.pub) - Add this SSH key to the VM, so that we can access the VM through the terminal of our local machine
- Use 30GB standard persistent disk, (as opposed to the default configuration of 10 GB balanced disks)
- Allow HTTP and HTTPS traffic in the firewall section
-
And other specifications as shown below
- Copy the public SSH key(s) of our local machine (example:
Soon, the VM will be ready:
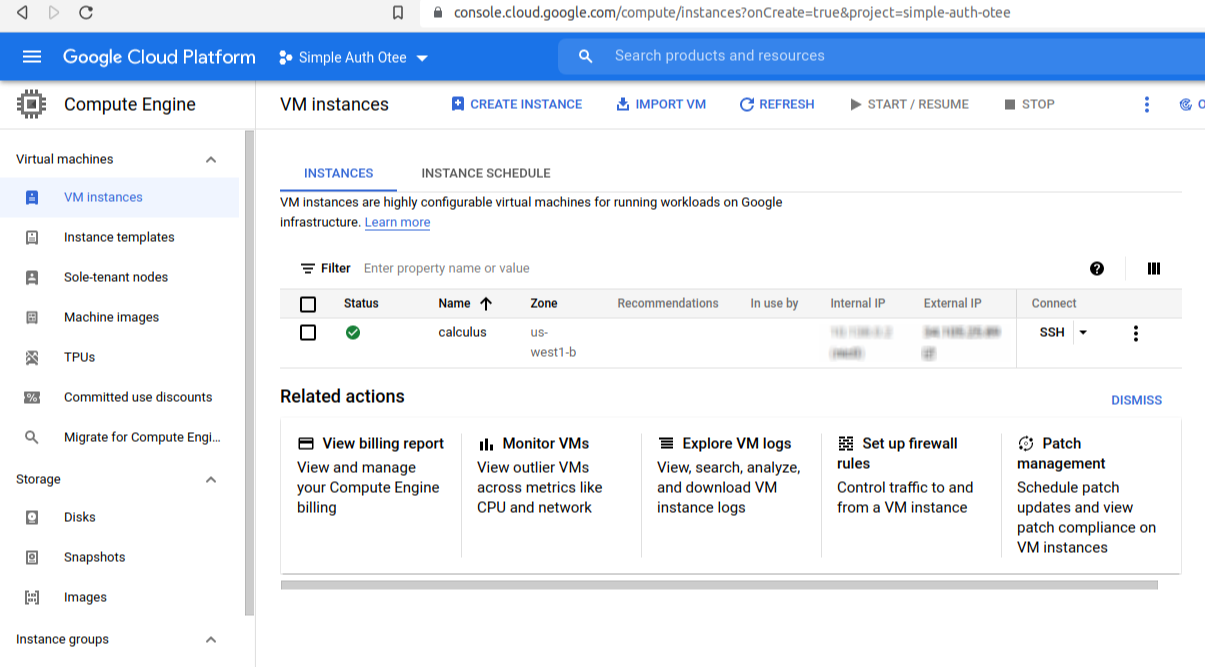
Configuring the VM
Note that there are two IP addresses provided by the VM:
- An interal IP for communicating with other virtual machines on same Virtual Private Cloud
- An external IP for communicating with the internet
We can click on the name of the vitual machine, to see more details about our VM. Given below, are the network details of the VM. Note that the External IP address is marked as ‘Ephemeral’, which means that this external IP address will change everytime the machine reboots. This means that, if we point our DNS entry (say, octopus.otee.dev) to this (ephemeral) IP Address, and then the machine reboots, as it will, periodically, our domain https://demo.otee.dev will stop working.

There is a way to avoid this: using a static IP Address instead. A static external IP address will remain assigned to our project indefintely, until we change it ourselves. We can do this by editing the VM, clicking on the ‘Network Interfaces’ tab and then reserving a static IP address, of the standard tier.
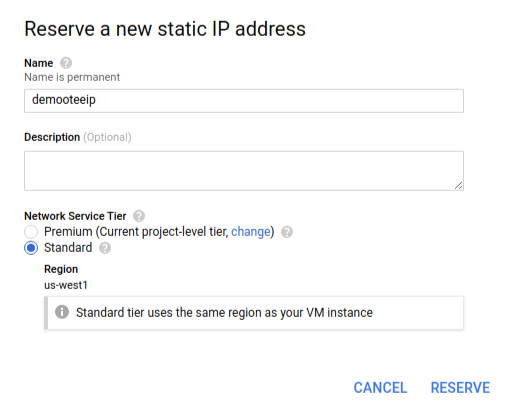
Now we are ready with the infrastructure!
Now, clicking on SSH should open a new tab with the terminal prompt of the VM.
SSH-ing From Local Terminal
Since we created this node with our public key, we should be able to SSH without the browser. Key points to note:
- The username used for SSH-ing should match the username in the public key (this can be seen in the SSH keys table of the instance details page)
- If there are multiple SSH keys (in our local machine) the
-ioption tosshcan be used to indicate which private key this SSH session should use:
$ ssh -i ~/.ssh/id_ed25519 oitee.codes@1.2.3.4
#IP address of the node is assumed to be: 1.2.3.4
- But, if we have only one SSH key, the
-ioption may be ignored:
$ ssh oitee.codes@1.2.3.4
#IP address of the node is assumed to be: 1.2.3.4
To see in details what happens in the background for SSH, we can use the -v option.
SSH-ing With an Alias
SSH-ing with so many options and the IP address can be inconvenient. To this end, we can specify per-host configurations so that we can refer to this VM by a name instead of typing out the IP address of the VM, along with a key (i.e., ~/.ssh/id_ed25519) and a username (i.e., oitee.codes).
For this, we need to create a config file:
$ nano ~/.ssh/config
The config file can contain the following details:
Host calculus # An alias; this need not match the name of the VM
    HostName 1.2.3.4 # This is the public IP address of the VM
    AddKeysToAgent yes # This ensures that we do not have to type SSH passphrase everytime
    User oitee.codes # This is the user account on the VM to which we will be SSHing
    IdentityFile ~/.ssh/id_ed25519 # This is the private key
After setting the config file, we can SSH simply by writing calculus
$ ssh calculus
To exit an SSH session, we should use ctrl + d.
Terminal Multiplexer
The terminal access created using ssh will only be active for the time we are working with it. The moment we close our terminal in our local machine or terminate our ssh window, we will lose the remote terminal.
To ensure continuity, we need a way to resume previous sessions on the VM. For this, we can use tmux(Terminal MultiPlexer), which, among other things, allows us to attach to a previously running shell session. Read more about tmux here: https://tmuxcheatsheet.com/
Here are some of the common short-cuts that are useful while navigating the terminal using tmux:
| Shortcut | Description |
|---|---|
tmux |
Starts a new tmux session |
tmux a or tmux attach |
Attaches to the last detached tmux session |
ctrl+b, c |
Creates a new tmux pane (i.e., tab) |
ctrl+b, n |
Goes to the next pane |
ctrl+b, p |
Goes to the previous pane |
ctrl+b, [ |
Enter scroll mode (scroll using arrows, or Page Up/Page Down) |
ctrl+b, d |
Detaches from the current tmux session. (Commands, panes, etc. are left intact; to be resumed later) |
ctrl+b, w |
Shows scrollable list of open panes |
To install tmux:
$ sudo apt update
$ sudo apt install tmux
$ tmux
Installing Node
Next, we should install Node.js (version 16+), following this guide:
$ sudo apt install -y curl
$ curl -fsSL https://deb.nodesource.com/setup_16.x | sudo -E bash -
$ sudo apt update
$ sudo apt install -y nodejs
$ node --version
Cloning Git Repository
Once we have installed Node.js, we can clone the GitHub repository which we want to deploy on the VM (for this, we may first need to create SSH keys and add them to GitHub; here’s how to do this):
$ git clone git@github.com:oitee/octopus.git
Starting octopus Server
Now that we have installed Node.js and have the repository hosting octopus (our toy project), we can launch the node process.
To see the environment variables required for starting up octopus, please checkout its ReadMe
$ CLIENT_ID=XXX CLIENT_SECRET=XXX PORT=4000 DOMAIN=http://localhost:4000 node server.js
Started listening on 4000...
We can check if the above command works, by going to the public IP of our VM at port 4000. 🤞🏻
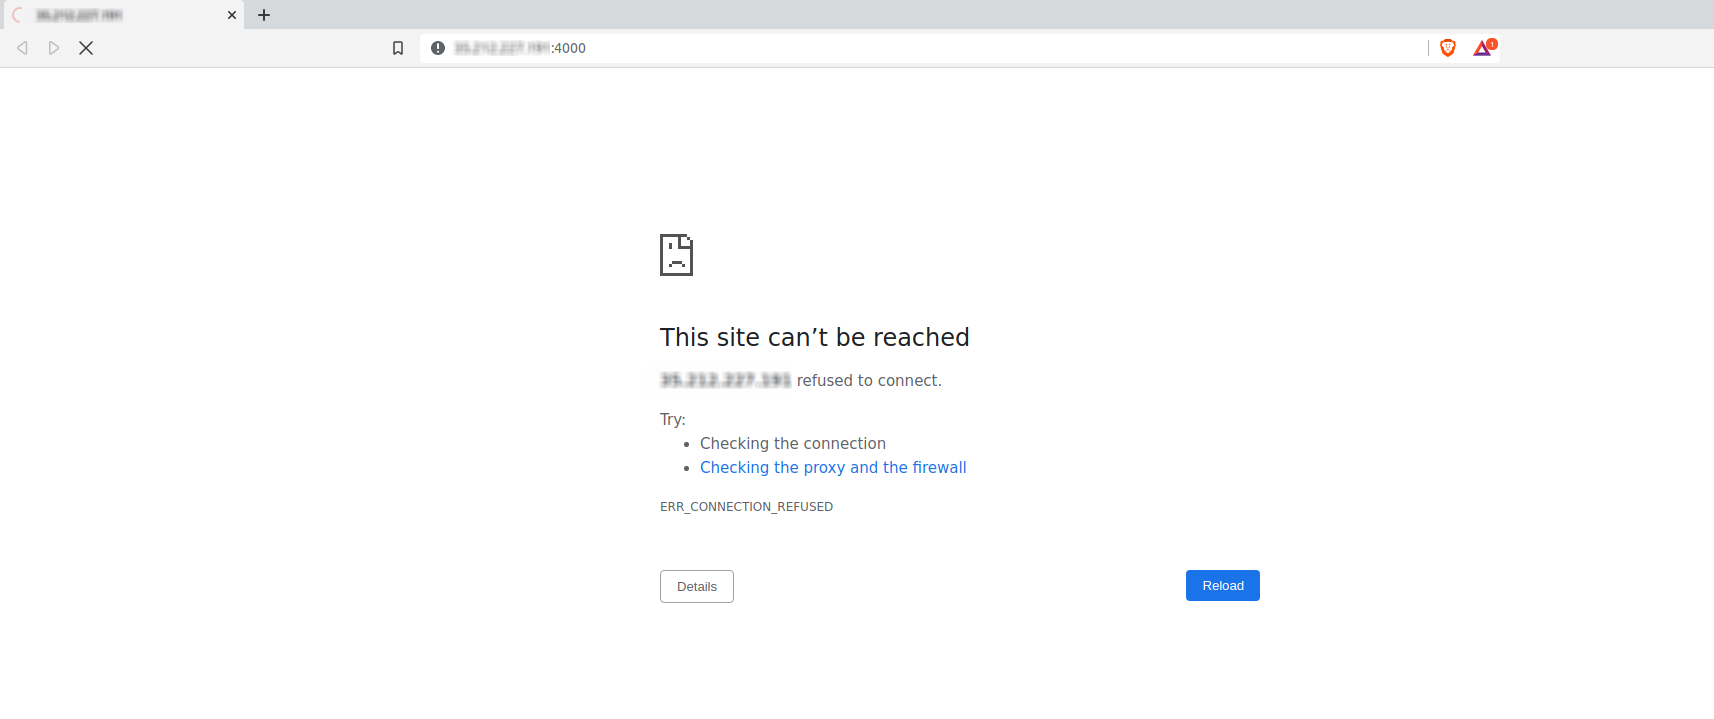
Unfortunately, we cannot access our application by visiting port 4000 of the public IP of the VM.
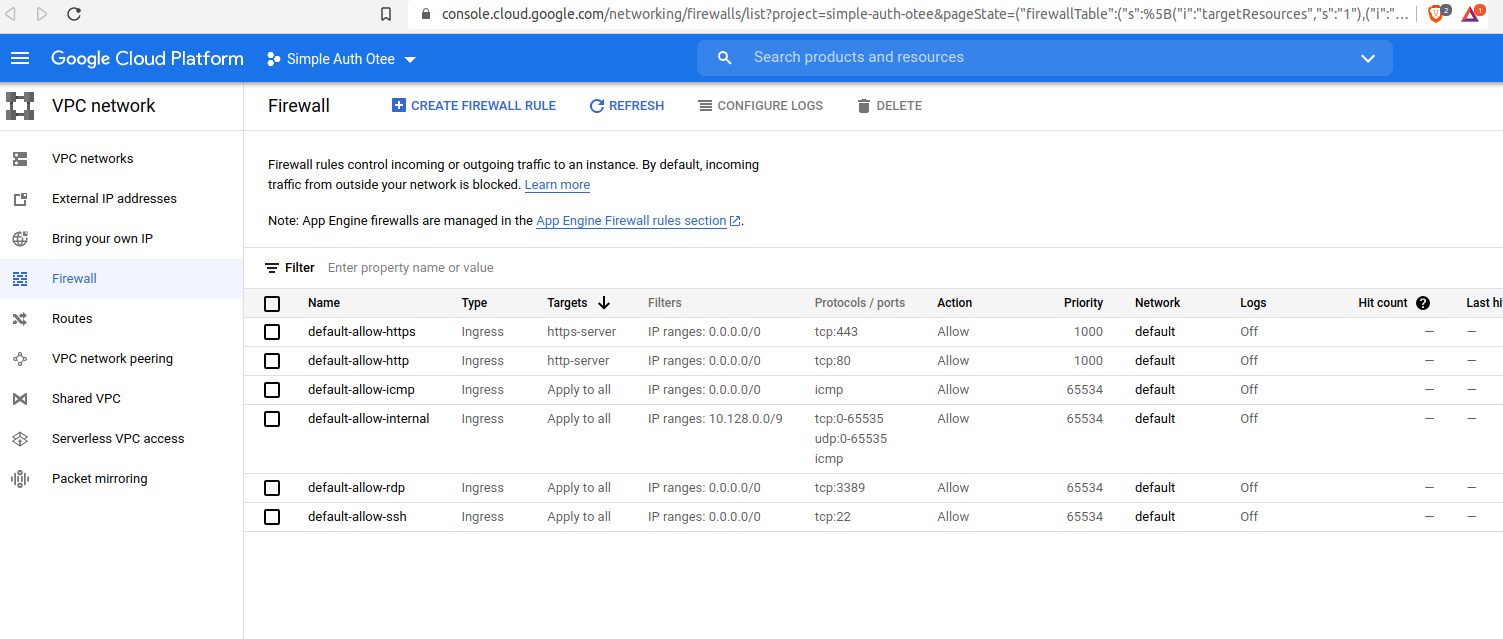
Why? It does not work because the GCE’s firewall allows only traffic to certain ports, such as port 80 (for HTTP), port 443 (for HTTPS) and port 22 (for SSH). All other ports are blocked for security reasons.
To solve this, one alternative is to use port 80. But we must to use sudo to start a process on a reserved port (here, 80). Note that sudo should be before the environment variables; otherwise, the environment variables apply only to the sudo command and not the command that the sudo runs
$ sudo CLIENT_ID=XXX CLIENT_SECRET=XXX PORT=80 DOMAIN=http://localhost:80 node server.js
Started listening on 80...
Now, it works!
NGINX: A Reverse Proxy
There are two drawbacks of using port 80:
- We cannot run more than one process at a time: If we wanted to use this VM to run two projects, it would not be possible (as only one process can bind to a port)
- We cannot transition from HTTP to HTTPS seamlessly, because a process can bind to only one port
To address these issues, we should use a reverse proxy. A reverse proxy takes all the traffic that comes to a given port (here, port 80), and redriects them to a specific internal port (like 4000), depending on certain filters. Our application will be completely oblivious of the proxy; it will keep listening its own port (e.g. port 4000).
First, we should install reverse proxy, namely Nginx.
$ sudo apt install nginx
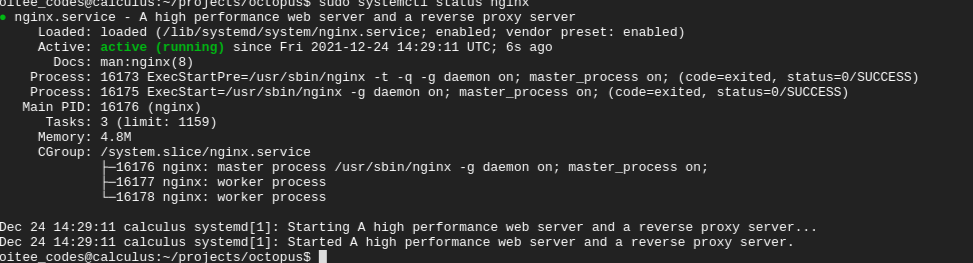
$ systemctl status nginx
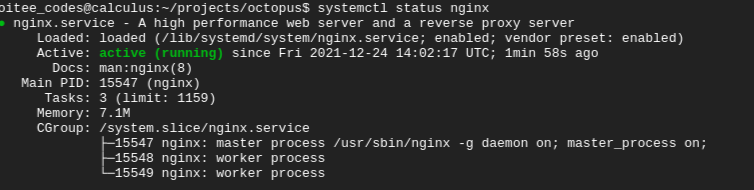
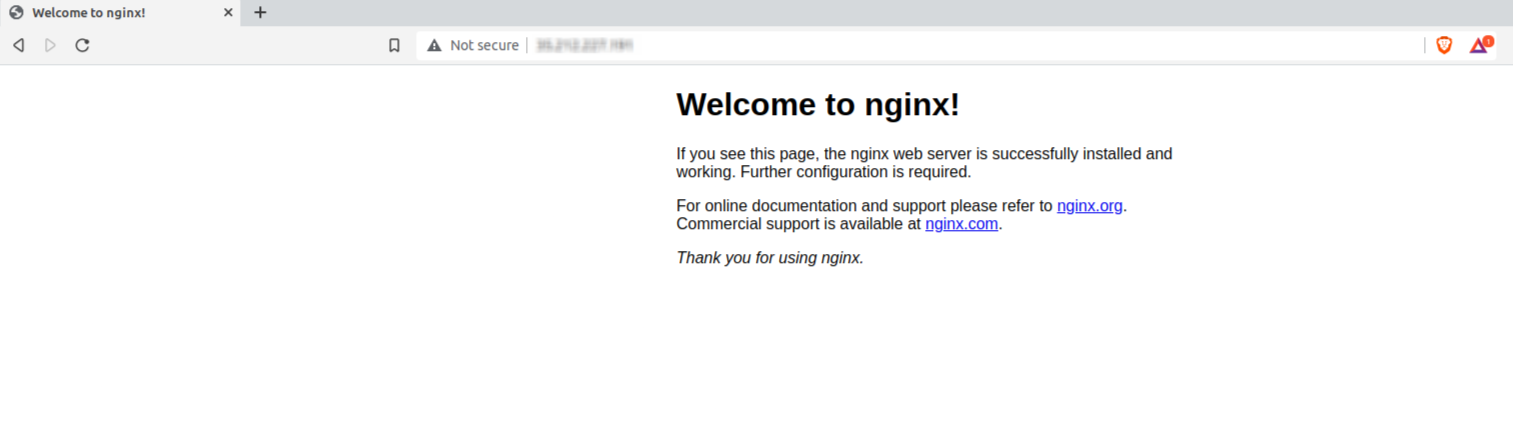
Once installed, Nginx will run on port 80; we can verify this by going to the IP address
Next, we need to redirect traffic from port 80 to an internal port, namely port 4000. But for this, we need to decide a filtering logic. Given that, we have a DNS entry for octopus.otee.dev, any request that comes to the VM’s IP address on port 80, with this HTTP host header, Nginx should redirect it to port 4000.
In Nginx, site configurations are kept in two directories:
/etc/nginx/sites-available: keeps all the site configurations but may not be enabled. Here, we will create a file foroctopus.otee.dev/etc/nginx/sites-enabled: a subset of the sites available, to which Nginx applies. Basically, these are symbolic links to the availale sites
First, we should create a configuration file for octopus.otee.dev in the /etc/nginx/sites-available directory (by using sudo nano /etc/nginx/sites-available/octopus.otee.dev):
server {
        listen 80;
        listen [::]:80;
        server_name octopus.otee.dev;
        location / {
         proxy_pass http://127.0.0.1:4000;
        }
}
We should mention the Host header field (i.e., the domain of our application) against the server_name field, to ensure that all requests made to the application’s domain are re-directed by Nginx.
We can configure Nginx, to have requests sent to a certain path(s) to be re-directed. Because we want all requests sent to our application to be redirected, no specific route has been specified against the location field.
The location of the server of our application should be specified against the proxy_pass field; this can be an actual IP address or carry a domain name. In the present case, the the port 4000 of the localhost of the VM as been specified against the proxy_pass field.(source)
Now we have to enable this configuration by adding a symbolic link to this configuration file in the /etc/nginx/sites-available directory:
$ sudo mv /etc/nginx/sites-enabled/default /tmp
$ sudo ln -s /etc/nginx/sites-available/octopus.otee.dev /etc/nginx/sites-enabled/octopus.otee.dev
Next, we should restart Nginx:
$ sudo systemctl status nginx
$ sudo systemctl restart nginx
Now Nginx is configured to listen to requests on octopus.otee.dev; but we do not (yet) have a way to convert the domain name octopus.otee.dev to the IP address of the VM. For this, we will add a sub-domain DNS entry to otee.dev, such that requests to the domain octopus.otee.dev get directed to the port 80 of the IP address of the VM.
Now we can run our server by updating the domain name from localhost:4000 to octopus.otee.dev; this is a specific step for this project as it demoes OAuth, which requires a redirection URL (Also, since we are no longer listening on a reserved port, we need not use sudo)
$ CLIENT_ID=XXX CLIENT_SECRET=XXX PORT=4000 DOMAIN=https://octopus.otee.dev node server.js
Started listening on 4000...
At this point, the above process should be working and we can check this by using curl:
$ curl http://octopus.otee.dev
To enforce HTTPS, we should use the freely available Certbot tool provided by Lets Encrypt.
Using Systemd to Manage the Node Process
The node process running in the background can crash due to unforeseen exceptions, out-of-memory errors or some other reason like restarting of the VM. When this happens (as they will inevitably do), our node process will terminate. This will make our web-service unreliable.
To solve this, we can use systemd. It is a “system and service manager” for Linux Operating Systems. Among many other things, it can ensure “starting / stopping / restarting programs” on our behalf. Most importantly, it can ensure that our node process is started if the VM crashes or is restarted. This is why systemd is known as an ‘init system’, whose main purpose is “to initialize the components that must be started after the Linux kernel is booted”.
To use systemd for our application, we need to create a new configuration file (with the extension service) in the location /lib/systemd/system
$ sudo nano /lib/systemd/system/octopus.service
In the configuration file octopus.service, we have to add the following details:
[Unit]
Description=octopus
Documentation=https://github.com/oitee/octopus#readme
After=network.target

[Service]
Environment=CLIENT_ID=XXX
Environment=CLIENT_SECRET=XXX
Environment=PORT=4000
Environment=DOMAIN=https://octopus.otee.dev
Type=simple
User=oitee.codes
ExecStart=/usr/bin/node /home/oitee.codes/projects/octopus/server.js
Restart=on-failure

[Install]
WantedBy=multi-user.target
In the above file, the following are the important keywords we should be careful about:
Environment: Using this, we can add the environment variables our application needs to access.User: We should mention the user that should run the application. (To find out the current user in a repository, usewhoami)ExecStart: We should mention the exact command to be executed. Note that, we have to use/usr/bin/nodeinsteadnodeto run a Node.js file.Restart: This tellssystemdwhen to restart our application, namely,on-failure. This means that the application will be automatically restarted, if it does not terminate “cleanly”.
After setting up our configuration file, we should use the following commands:
$ sudo systemctl daemon-reload #This needs to be done whenever we change a service file
$ sudo systemctl start octopus.service # This starts our application
# We can remove the .service part above
To restart and stop a running service, we can use the restart and stop commands:
$ sudo systemctl restart octopus.service
$ sudo systemctl stop octopus.service
But the most importantly, to tell systemd to start our application everytime the VM boots, we should use the enable command:
$ sudo systemctl enable octopus.service
Similarly, to stop our application from being launched at the time of booting, we can use disable:
$ sudo systemctl disable octopus.service
We can now see the status of our application (including logs) using the status command along with systemctl:
$ sudo systemctl status octopus.service
● octopus.service - octopus
     Loaded: loaded (/lib/systemd/system/octopus.service; disabled; vendor preset: enabled)
     Active: active (running) since Wed 2021-12-29 08:47:38 UTC; 2h 50min ago
       Docs: https://github.com/oitee/octopus#readme
   Main PID: 39619 (node)
      Tasks: 11 (limit: 1159)
     Memory: 39.3M
     CGroup: /system.slice/octopus.service
             └─39619 /usr/bin/node /home/oitee.codes/projects/octopus/server.js

Dec 29 08:47:38 calculus systemd[1]: Started octopus.
Dec 29 08:47:40 calculus node[39619]: Started listening on 4000...
We can also see if our application is running, enabled, or has failed by using the is-active, is-enabled and is-failed commands:
$ sudo systemctl is-active octopus.service
active
$ sudo systemctl is-enabled octopus.service
enabled
$ sudo systemctl is-failed octopus.service
active
Conclusion (Phew!)
After completing all the steps above, it is easy to appreciate the difference while deploying our application using a PaaS (like Heroku) and a IaaS (like GCE):
- A lot of the heavy lifting for deploying the code is managed behind-the-scenes by the PaaS (i.e., Heroku).
- However, we are giving up the ability to control the system, when we use PaaS. For example, we might want to use one hardware for running multiple applications (to have better cost efficiency).
- IaaS needs to be set up only once, after which it becomes as maleable as any linux machine, which means that the languages and run-times supported will not be limited.
octopus—deployed using GCE—can be accessed here: https://octopus.otee.dev
References
- https://www.redhat.com/en/topics/cloud-computing/iaas-vs-paas-vs-saas
- https://cloud.google.com/free/docs/gcp-free-tier/#compute
- https://cloud.google.com/compute/docs/ip-addresses
- https://nodesource.com/blog/running-your-node-js-app-with-systemd-part-1/
- https://nodesource.com/blog/running-your-node-js-app-with-systemd-part-1/
- https://www.digitalocean.com/community/tutorials/how-to-use-systemctl-to-manage-systemd-services-and-units#:~:text=To tell systemd to start,service